Creating Sampling Design in QGIS
In ecological studies, planning for sampling design is a crucial task to do to ensure that research objectives will be achieved. Many sampling designs have been developed and implemented in ecological studies (Sutherland 2006). Among of the widely used designs are random and stratified samplings or the combination of the two, which is called stratified random. These techniques are used to avoid bias of sampling in varying density of species populations in the study area.
To guide you in research planning, this section will demonstrate how to generate random points that can be used to identify possible areas for study.
Random sampling of points
1. Open QGIS and load the iba.shp polygon layer. This layer is the study area you will conduct the sampling, we will create a new point layer of 100 random points within the boundary of the polygon.
2. In the Menu select
Vector ‣ Research Tools ‣
 Random Points.
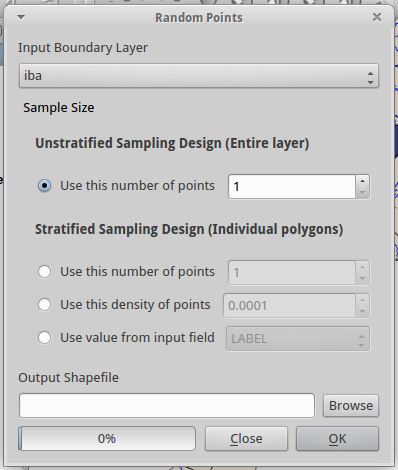
3. Select iba as your Input Boundary Layer.
4. Under the Unstratified Sampling Design, type 100 in the Use this number of points.
5. In the Output Shapefile click Browse and create a new Shapefile as random_100pts.shp. Click OK.

6. Click Yes to add the new layer to your Map Canvas. Click Close to close the Random Points window.
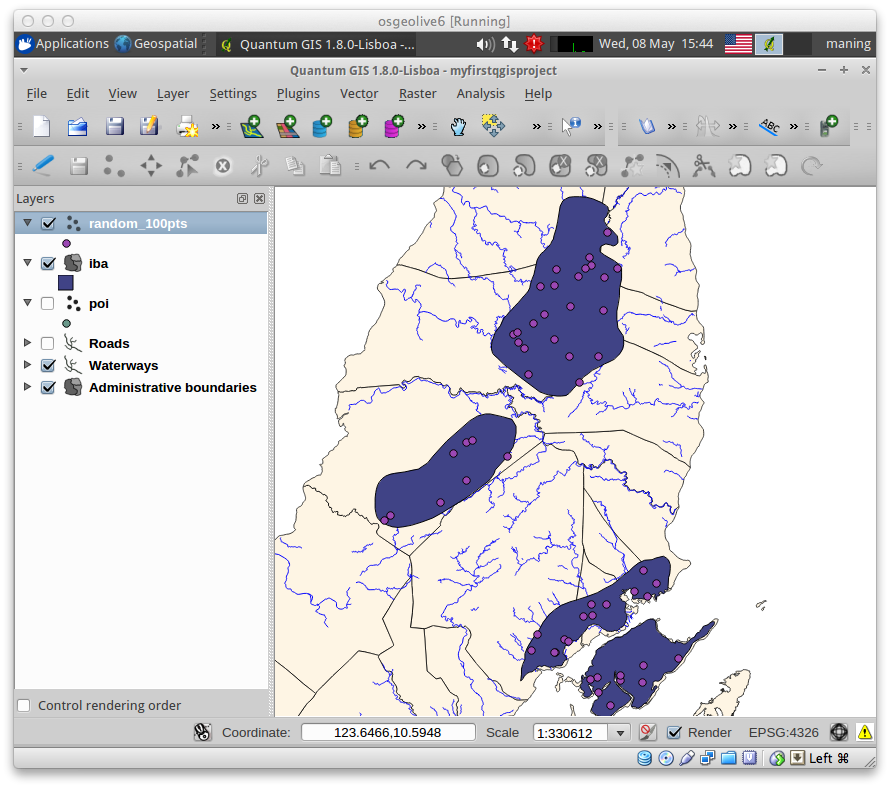
The created point layer has 100 randomly placed points within the boundary of the polygon.
Stratified random sampling
The same tool can also create a stratified sample of points based on the input boundary layer.
1. In the Menu select
Vector ‣ Research Tools ‣
Random Points.
2. In the Output Shapefile click Browse and create a new Shapefile as strat_50pts.shp. Click OK.
3. Under the Stratified Sampling Design, type 50 in the Use this number of points. Click OK.
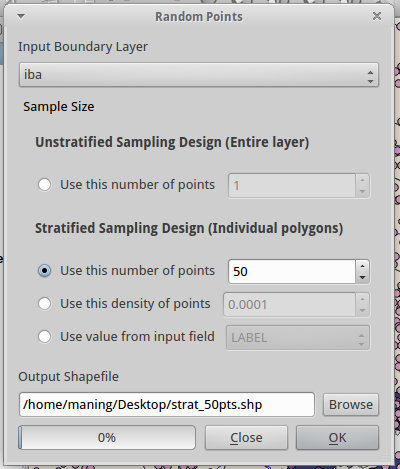
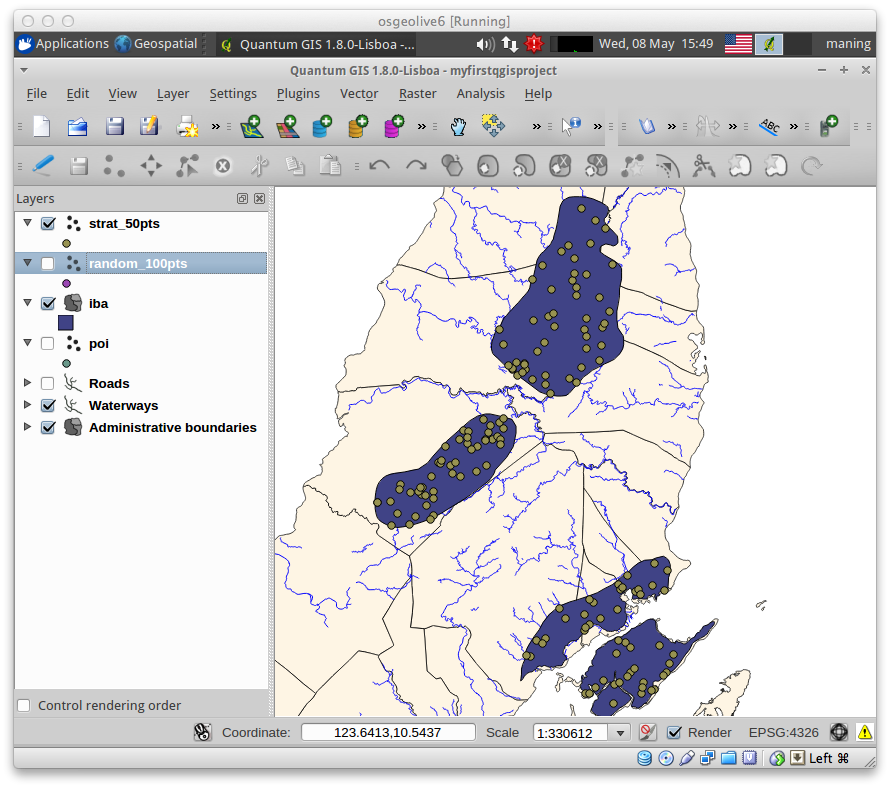
This option will create 50 points for each polygon in the input boundary layer
The Use this density of points option is for a fixed density. The third Use value from input field option will use the value in a column in your attribute table to determine the number of sample points.
4. Click Yes to add the new layer to your Map Canvas. Click Close to close the Random Points window.
Explore the other tools available in the Research Tools.
| Icon | Tool | Purpose |
|---|---|---|
 |
Random selection | Randomly select n number of features, or n percentage of features |
 |
Random selection within subsets | Randomly select features within subsets based on a unique ID field. |
 |
Regular points | Generate a regular grid of points over a specified region and export them as a point Shapefile. |
 |
Vector grid | Generate a line or polygon grid based on user specified grid spacing. |
 |
Select by location | Select features based on their location relative to another layer to form a new selection, or add or subtract from the current selection. |
 |
Polygon from layer extent | Create a single rectangular polygon layer from the extent of an input raster or vector layer. |
You can also save the sampling points as a GPX file which you can upload in your GPS device.